LED area lights (also called LED shoebox lights or site lights) are the gold standard for illuminating parking lots, roadways, loading docks, and building perimeters. They are energy-efficient, long-lasting, and deliver superior light quality compared to old metal halide or high-pressure sodium fixtures.
But even the best LED area light will underperform—or fail prematurely—if it is installed incorrectly or neglected over time.
This practical guide covers everything you need to know: pre-installation planning, proper mounting, wiring, common mistakes, and a simple maintenance schedule that keeps your lights running for 10+ years.
1. Before Installation: Planning & Site Assessment
Rushing into installation without a plan is the #1 cause of poor performance and wasted money.
Step 1: Determine Your Lighting Requirements
| Question | What to Consider |
|---|---|
| What area needs illumination? | Parking lot, driveway, loading dock, pathway, building facade |
| What are the dimensions? | Length, width, and mounting height |
| What is the existing pole spacing? | Measure distance between poles |
| What is the target light level? | Parking: 2–5 footcandles; security: 5–10 footcandles |
| Are there dark sky or glare ordinances? | Some municipalities require full cutoff / shielded fixtures |
Step 2: Choose the Correct Fixture for Your Application
| Factor | Recommendation |
|---|---|
| Lumens | Small lot: 10,000–15,000 lm; large lot: 20,000–40,000 lm |
| Color temperature | 4000K (neutral) or 5000K (daylight/security) |
| Optics (beam pattern) | Type II (roadways), Type III (parking lots), Type IV (perimeter), Type V (open areas) |
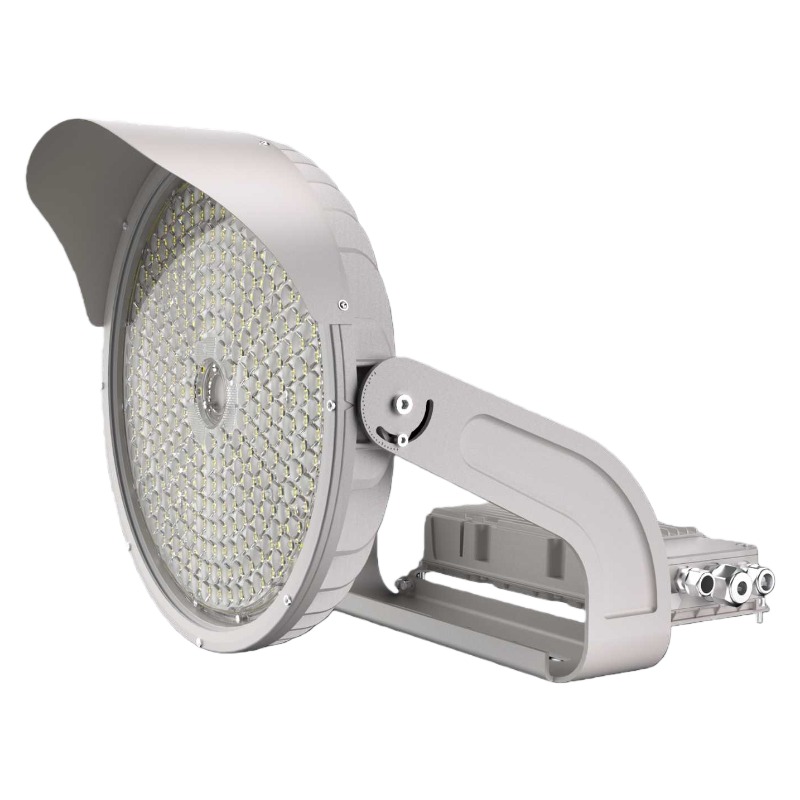
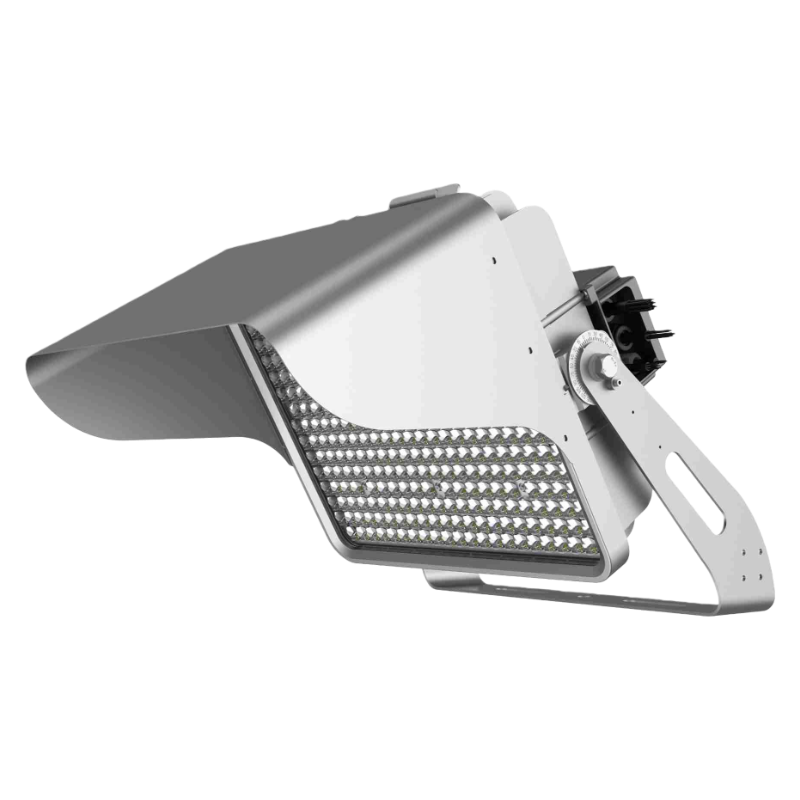
| Mounting type | Slip fitter (round poles), trunnion (wall/square poles), yoke (adjustable) |
| Voltage | 120–277V (standard), 347–480V (industrial), or 12–24V DC (solar) |
| Certifications | UL/cUL, DLC listed (for rebates), IP65 or IP66 (weather resistance) |
Step 3: Gather Tools & Materials
| Tools | Materials |
|---|---|
| Non-contact voltage tester | LED area light fixture(s) |
| Multimeter | Mounting hardware (slip fitter, bolts) |
| Wire strippers / cutters | Wire nuts (sized for wire gauge) |
| Wrenches / socket set (metric or SAE) | Electrical tape |
| Torque wrench (for slip fitter bolts) | Conduit and fittings (if new wiring) |
| Ladder or bucket lift | Safety cable or lanyard |
| Level | Threadlocker (Loctite) |
Pro tip: For pole-mounted area lights, use a bucket truck or boom lift—not a ladder—for safety.
2. Installation: Step-by-Step
Step 1: Turn Off Power & Verify
-
Switch off the breaker controlling the circuit.
-
Lock and tag the breaker if possible.
-
Use a non-contact voltage tester to confirm zero voltage at the pole or junction box.
⚠️ Never assume power is off. Always verify.
Step 2: Remove the Old Fixture (If Retrofitting)
If replacing an existing HID or fluorescent area light:
-
Disconnect wiring (take a photo for reference).
-
Remove the old fixture from the pole tenon or wall bracket.
-
Inspect the pole tenon and wiring compartment for rust, water damage, or animal nests.
-
Clean the tenon of old paint, rust, or debris.
Properly dispose of old lamps – metal halide and HPS lamps contain mercury and require hazardous waste handling.
Step 3: Prepare the Mounting
For slip fitter mounting (most common – round poles):
-
The slip fitter slides over the pole tenon (typically 2⅜" or 3" OD).
-
Do not overtighten – use a torque wrench (typically 15–20 ft-lbs for set screws).
-
Apply threadlocker to set screws to prevent vibration loosening.
For trunnion mounting (walls or square poles):
-
Mark and drill holes if needed.
-
Use stainless steel bolts (corrosion resistant).
-
Ensure the bracket is level before tightening.
For yoke mounting (adjustable angle):
-
Attach yoke to wall or pole bracket.
-
Adjust tilt angle (0–15° typical) for desired coverage.
-
Tighten locking nuts securely.
Step 4: Make Electrical Connections
Wiring conventions (typical for 120–277V AC):
| Wire Color | Function |
|---|---|
| Black | Line (Live / Hot) |
| White | Neutral |
| Green or Yellow/Green | Ground |
| Purple + Pink (or Gray) | 0–10V dimming (if equipped) |
Step-by-step:
-
Feed supply wires into the fixture's driver compartment.
-
Use a strain relief or cord grip where wires enter the fixture.
-
Strip wires ½" (12 mm).
-
Connect line to line, neutral to neutral, ground to ground using wire nuts.
-
If dimming: Connect purple to purple, pink to pink.
-
Gently tug each connection to ensure it is secure.
-
Wrap wire nuts with electrical tape (optional but recommended for outdoor use).
-
Tuck wires neatly into the compartment and close the cover securely.
⚠️ For 347–480V installations, follow manufacturer's specific wiring diagram. Use appropriately rated wire nuts and PPE.
Step 5: Secure the Fixture
-
Slide the slip fitter fully onto the tenon until seated.
-
Tighten set screws evenly (crisscross pattern) to the specified torque.
-
If using a safety cable (recommended for large fixtures >10 lbs), attach one end to the fixture and the other to a separate anchor on the pole.
-
Gently shake the fixture – it should not wobble or rotate.
Step 6: Aim the Fixture (If Adjustable)
-
For parking lots: Aim slightly downward (0–5° tilt) for even coverage.
-
For building perimeters: Use Type IV optics aimed outward.
-
For roadways: Aim straight ahead with Type II optics.
Use a laser level or string line when installing multiple fixtures to ensure consistent aiming.
Step 7: Test the Installation
-
Restore power at the breaker.
-
Stand clear of the fixture (in case of arc flash or debris).
-
Turn on the switch (or wait for photocell to activate if dusk‑to‑dawn).
-
Check for:
-
Instant illumination (no flicker)
-
Correct brightness
-
No buzzing, humming, or vibration
-
No smoke or burning smell
-
-
Test photocell: Cover sensor – light should turn on. Uncover – light should turn off (may have 30–60 sec delay).
-
Test motion sensor (if equipped): Walk away – light dims; walk back – light brightens.
If the fixture does not light, turn off power and re‑check connections.
3. Common Installation Mistakes to Avoid
| Mistake | Consequence | Prevention |
|---|---|---|
| Wrong optics for application | Dark zones or light trespass | Use Type III for parking lots, Type IV for perimeters |
| Overtightening slip fitter bolts | Cracked housing or stripped threads | Use torque wrench (15–20 ft-lbs typical) |
| No threadlocker on set screws | Fixture rotates or loosens over time | Apply medium-strength threadlocker |
| Pinched wires under cover | Short circuit or intermittent operation | Route wires neatly; use strain relief |
| Ignoring voltage compatibility | Driver failure (smoke, fire, no light) | Verify fixture voltage matches supply |
| Mounting too high or too low | Poor ground illumination | Follow manufacturer's recommended height range |
| No surge protection | Fixture fails after first lightning storm | Choose fixture with 5kV–10kV surge protection |
| Skipping safety cable | Fixture falls if primary mount fails | Always install secondary support for fixtures >10 lbs |
4. Maintenance: Keep Your LED Area Lights Running for 10+ Years
One of the biggest advantages of LED area lights is minimal maintenance. However, "minimal" does not mean "none."
Quarterly Maintenance (Every 3 Months)
| Task | How To |
|---|---|
| Visual inspection | Look for cracks, water intrusion, insect nests, or discoloration |
| Clean lenses | Use a soft cloth or sponge with mild soap and water (no abrasive cleaners) |
| Check for dimming or flickering | Indicates possible driver or LED board issue |
✅ Clean lenses at night when the light is on – you can see exactly where dirt is blocking light output.
Annual Maintenance
| Task | How To |
|---|---|
| Tighten all hardware | Check slip fitter set screws, bracket bolts, and pole access covers |
| Test photocell | Cover sensor – light should turn on within 1–2 minutes |
| Test motion sensor | Verify dimming and brightening response |
| Test emergency battery backup (if equipped) | Turn off main power – backup should keep light on for 90+ minutes |
| Inspect wiring compartment | Look for moisture, corrosion, loose wire nuts, or rodent damage |
| Check surge protection status (if indicator LED present) | Some fixtures have a status light showing surge protection is still functional |
As-Needed Maintenance
| Issue | Action |
|---|---|
| Water inside lens | Replace gasket or seal; check for cracked housing |
| Yellowed or hazy lens | Replace lens (polycarbonate can UV‑degrade after 5–7 years) |
| Intermittent operation | Likely loose connection or failing driver |
| Fixture completely dead | Check breaker, then wiring. If both are good, driver may have failed. |
5. Troubleshooting Common Problems
| Symptom | Most Likely Cause | Solution |
|---|---|---|
| Fixture does not turn on | No power, loose connection, or dead driver | Check breaker. Verify voltage at fixture. Check wire nuts. |
| Flickering or strobing | Loose wiring, incompatible dimmer, or failing driver | Tighten connections. Remove dimmer or test with compatible control. |
| Dim output (less than expected) | Dirty lens, driver failure, or LED degradation | Clean lens. Test voltage. Check warranty. |
| Fixture turns on and off randomly | Overheating (poor ventilation) or photocell sensing reflected light | Ensure fixture has airflow. Reposition photocell or add shield. |
| Water inside housing | Failed gasket, cracked lens, or loose screws | Dry fixture. Replace gasket. Seal with approved outdoor sealant. |
| Motion sensor not responding | Sensitivity too low, sensor blocked, or wiring issue | Adjust DIP switches. Clean sensor lens. Check connections. |
6. Extending Lifespan: Best Practices
| Best Practice | Why It Helps |
|---|---|
| Ensure proper ventilation | LEDs run cooler = longer life. Don't mount fixtures flush against walls without airflow. |
| Clean lenses twice per year | Dirt blocks light and traps heat. |
| Use surge protection | 80% of premature LED driver failures are caused by power surges (lightning, grid switching). |
| Choose fixtures with replaceable drivers | The LEDs may last 100,000 hours, but drivers often fail earlier. Replaceable drivers avoid full fixture replacement. |
| Follow dimming guidelines | Dimming below 10% on some drivers can cause flicker or damage. Stay within manufacturer's range. |
7. When to Replace vs. Repair
| Situation | Action |
|---|---|
| Fixture < 5 years old, driver failed | Replace driver (if available as a spare part) |
| Fixture < 5 years old, LEDs failed | Claim warranty (reputable brands offer 5–10 years) |
| Fixture > 8 years old, driver failed | Replace entire fixture (LED technology has improved significantly) |
| Lens yellowed or cracked | Replace lens (cheaper than new fixture) |
| Housing corroded or damaged | Replace fixture (safety concern) |
Pro tip: Keep one spare LED area light in inventory. When a fixture fails, swap it immediately, then repair the failed unit off‑line. Minimizes downtime.
8. Safety Reminders for Maintenance
-
Always turn off power before opening any wiring compartment or touching electrical connections.
-
Use a bucket lift or scissor lift for pole‑mounted fixtures. Do not climb poles.
-
Wear appropriate PPE: Insulated gloves, safety glasses, hard hat.
-
Never work on outdoor fixtures during rain, snow, or high winds.
-
If you are not a qualified electrician, hire one for any work involving live wires or high poles.
9. Quick Reference: Recommended Maintenance Schedule
| Frequency | Tasks |
|---|---|
| Monthly | Visual check (any dark fixtures? any visible damage?) |
| Quarterly | Clean lenses, check for flicker, inspect mounting hardware |
| Annually | Tighten all hardware, test photocell/motion sensor, test battery backup, inspect wiring |
| Every 5 years | Consider lens replacement (if yellowed), evaluate if new LED technology offers significant upgrade |
| Every 10+ years | Full fixture replacement (end of useful life) |
Conclusion
Proper installation and regular maintenance are the two pillars of long-lasting, high-performing LED area lights.
Installation checklist:
-
Correct optics for your application
-
Secure slip fitter mounting (torque + threadlocker)
-
Weatherproof electrical connections
-
Safety cable (for fixtures over 10 lbs)
-
Surge protection (5kV minimum)
-
Tested photocell and/or motion sensor
Maintenance checklist:
-
Clean lenses quarterly
-
Tighten hardware annually
-
Test sensors and backup batteries annually
-
Keep a maintenance log
Follow this practical guide, and your LED area lights will deliver reliable, energy-efficient illumination for a decade or more—with very little trouble in between.